Wireless Printing at the Library
Using our wireless printing service from SavaPage, you can send documents to be printed from your laptop, tablet, or other mobile device to any of the library locations below.
Amherst Libraries
Audubon Branch
Clearfield Branch
Eggertsville-Snyder Branch
Williamsville Branch
Buffalo Branches
Central Library (Downtown Buffalo)
Crane Library
Dudley Library
East Clinton Library
Frank E. Merriweather, Jr.
Isaias Gonzalez-Soto Library
Leroy R. Coles, Jr Library
Collins Public Library (Town of)
Tonawanda Public Library (City of)
Town of Tonawanda
*More locations coming soon!
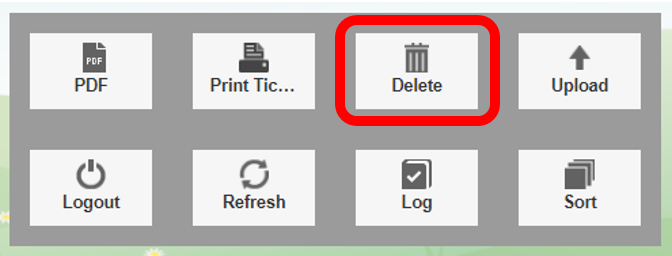
Staff cannot selectively release specific pages to print, but you are able to edit and select pages after you email or upload the document and before submitting it to a Library printer.
*You need a valid Library Card and PIN number to use wireless printing. You can obtain a card by visiting any library location, or can signup online.
If you have not used the Library's wireless printing service before, you will need to set up a print account. Visit https://print.buffalolib.org/signup and sign in with your Library Card number and PIN. It will create a printing account for you and provide a link to the printing server.
How to Print
Printing is a 3 step process:
- Email or Upload your document to the print server
- Select the Library printer of your choice by logging into the print server, where you can also edit the the document if needed
- Visit the library to pay for your printing and staff will release it to the printer
1 Email or Upload the document
There are 2 ways to send a document to print:
Email it to print@buffalolib.org. This method requires you to have an email address on file and connected to your Library Card,
OR
Upload it by logging into the print server at http://print.buffalolib.org with your Library Card number and PIN. Click the Upload button (the one with the up arrow). Follow the on-screen instructions.
2 Select a Library and Submit your document to a printer
If you emailed your print job, log into https://print.buffalolib.org don't wish to email your print job, you can upload it to the server manually.
The URL to log in to check the document awaiting printing, or to upload one is https://print.buffalolib.org
Log in with your Library Card and PIN
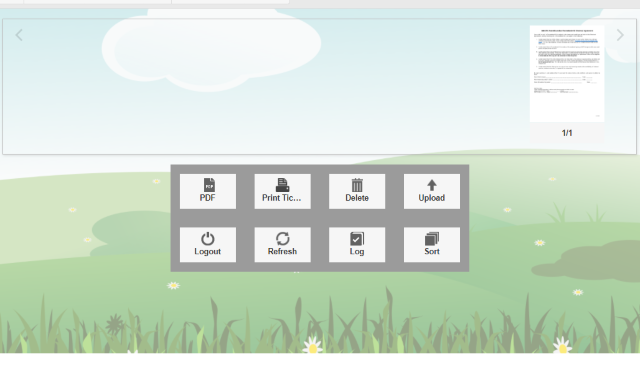
If you’ve submitted one or more documents you will see them in the top area of the screen. Function choices are in the center.
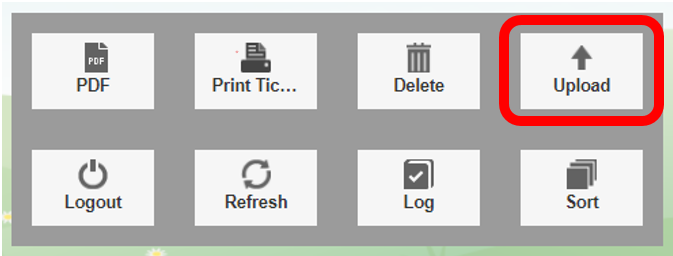
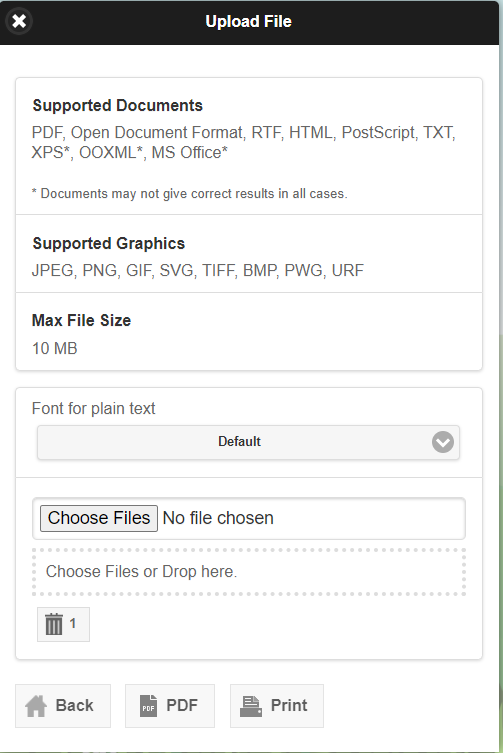
The Upload button (up arrow) s the second way to send a document if you choose not to email it as an attachment. Click it and it will provide a standard web upload screen. Use “Choose Files” button to select the file to print, or drag and drop from your file manager to the area shown. This are allows you to also save the submitted file back to your device as a PDF file.
Be sure to click or tap the Upload button after choosing the file before selecting Print or PDF!
If it shows a successful upload, click the Print ICON. This will cause the item to show along the top as per above.

Clicking the Printer ICON is how you submit one or more of your documents to the printer release station. This is step 2 of printing as referenced above.
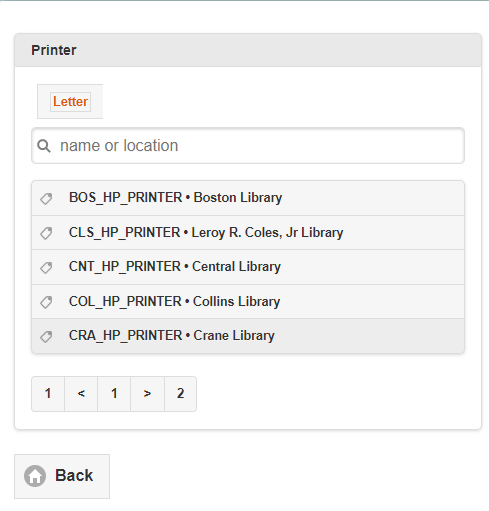
When you click it, you may be presented with a list of printers. If you do not see your location’s printer in the list, you can start entering the library name in the search box and that will bring it up.
You can then select print out options such as 2 sided, or color printing etc.
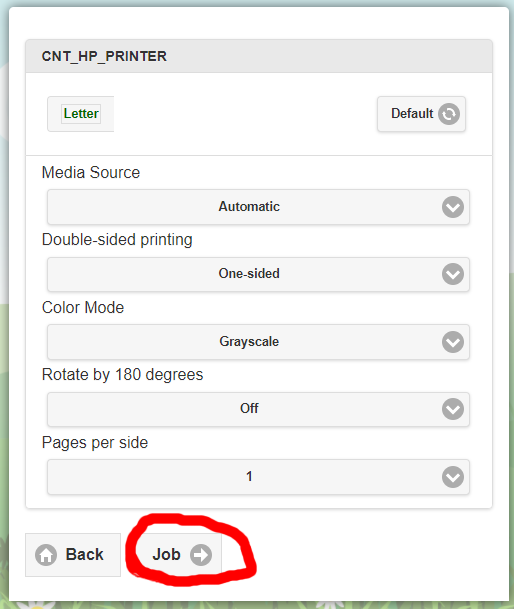
Click the job button to continue
The next screen is your last chance to confirm printer, the document you are printing, etc.
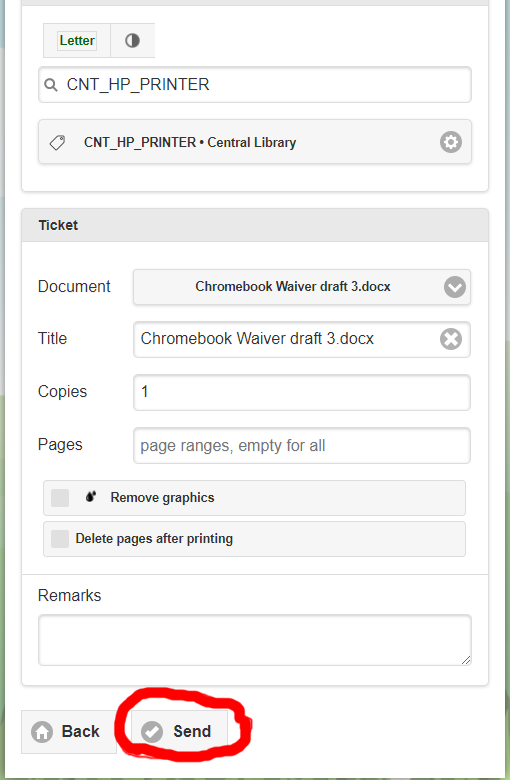
Click Send to submit it to the printer/print release station.
You will be returned to your main screen.
3 Pay and Release
You can now go to the desk to pay for your print and obtain your printout.
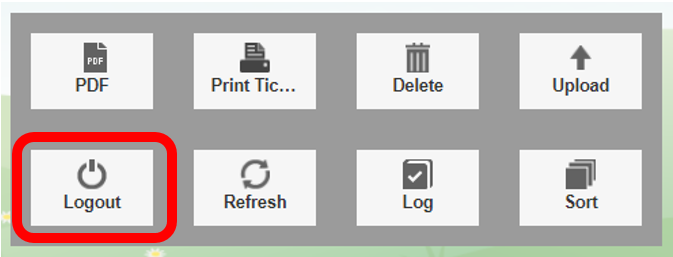
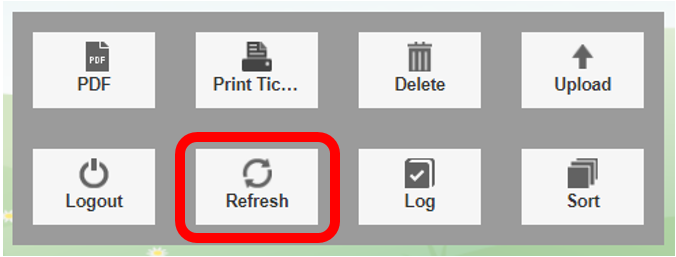
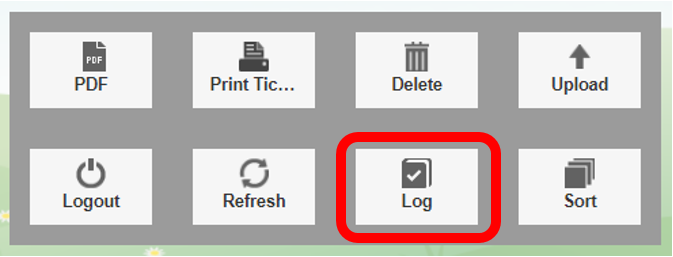
Other Menu Icons and their purpose
Other icons left to right
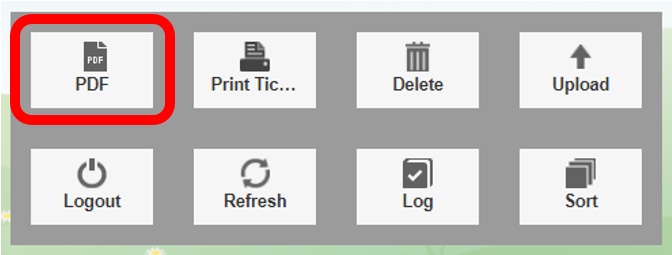
Clicking the PDF icon allows you to download your print document as a PDF file
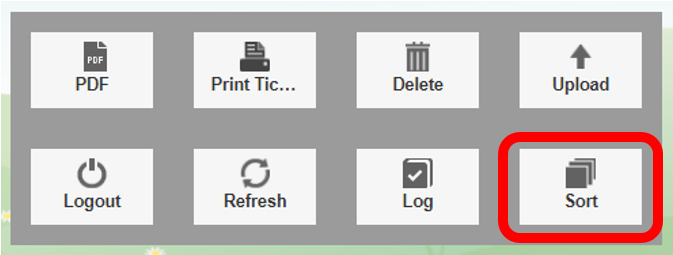
And lastly, the Sort ICON allows you to sort your documents.
Editing before Printing
You can do some editing of the submitted documents for printing prior to sending them to the printer/print release station. You do this by clicking or tapping the page you want to adjust. Click the three dots along the lower edge of the screen to open editing functions.
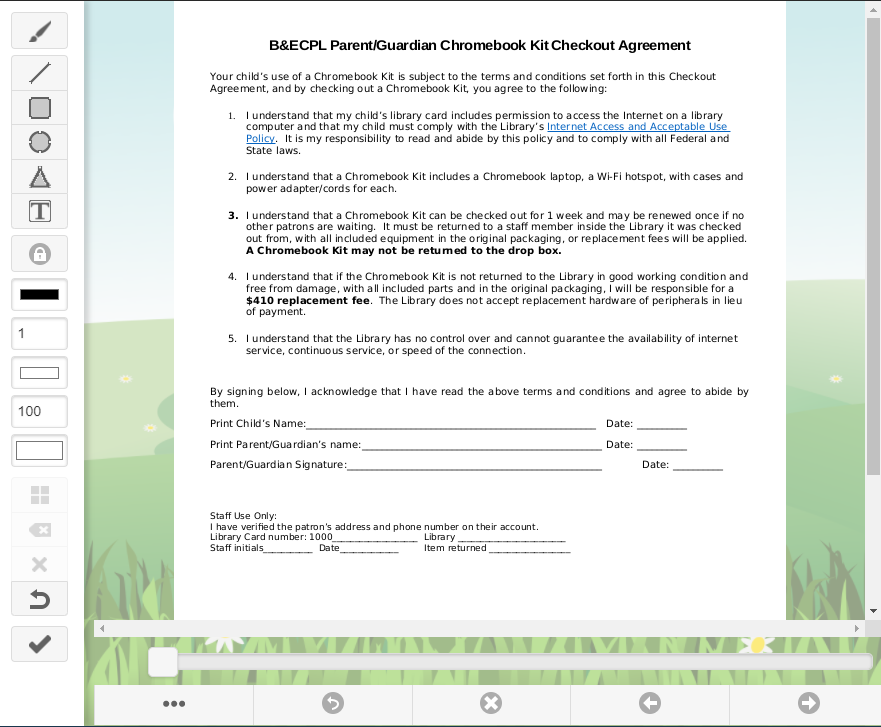
You can highlight, circle and enter text that would appear on the final output. You can also delete the page so it does not show on the final printout by clicking the X in the middle along the bottom.
Click the checkmark to Save, or the curved back arrow next to the 3 dots to exit.
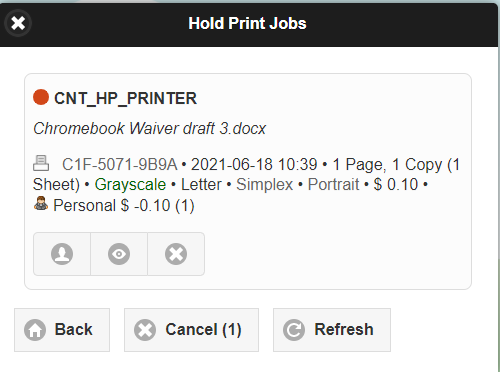
How to see not yet released prints
Along the bottom left you can see what unreleased print jobs you have waiting, and their total cost.
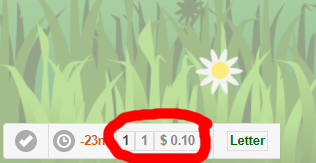
If you click or tap on that area you will see what printouts are waiting and their details.